Notification > RCS Bizmessage > Console Usage Guide
To use the RCS Bizmessage service, you can use it after completing identity verification in [Console > RCS Bizmessage > Identity Verification] (in compliance with the Telecommunications Business Act).
Identity Verification
- The identity verification process has been applied to the RCS Bizmessage service to comply with the Telecommunications Business Act.
- To use the RCS Bizmessage service, the identity verification process is required. Identity verification basically requires mobile phone identification and additional document screening according to the member type.
- Without identity verification, all features other than the Identity verification tab will be disabled.
- The RCS Bizmessage service is not available to individual members.
- The name and mobile phone number entered at the time of membership must match the information entered at the time of identity verification to be approved for identity verification.
- Proof of employment can only be documents with the date of issuance and a stamp.
Make sure you mask (hide) the last 6 digits of your resident registration number in your employment certificate. Example) 000000-0******
Required documents according to membership type
| Member Type | Verification Method | Required Documents |
|---|---|---|
| Business Representative | Mobile Phone Identification | Business Registration Certificate, Certificate of Employment |
| Business Executives and Employees | Mobile Phone Identification | Business Registration Certificate, Certificate of Employment |
Identity verification process
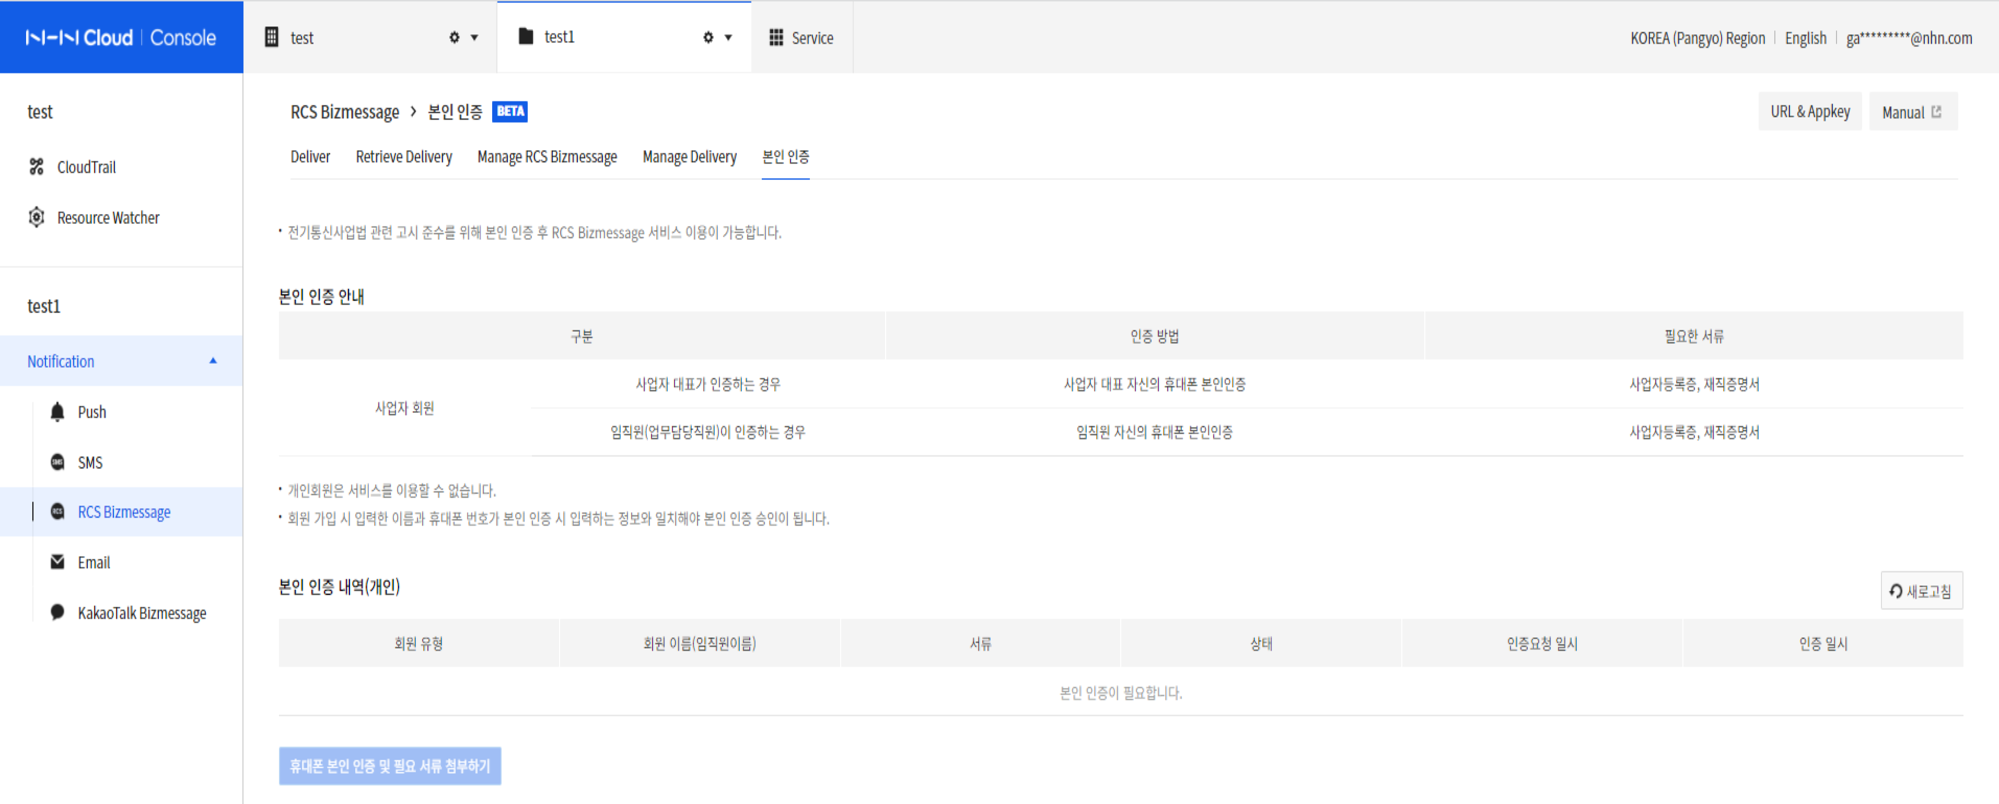 1. Select the Settings tab.
2. Click Mobile Verification and Add Required Documents to begin the process.
3. Agree after checking the consent to collect and use personal information.
4. Proceed with the identity verification process through mobile phone text authentication or simple identity verification.
5. Attach any required documentation to register.
6. Wait for the operator inspection and approval process.
7. Once the identity verification process is completed, the approval results will be sent to the mail registered with your account.
1. Select the Settings tab.
2. Click Mobile Verification and Add Required Documents to begin the process.
3. Agree after checking the consent to collect and use personal information.
4. Proceed with the identity verification process through mobile phone text authentication or simple identity verification.
5. Attach any required documentation to register.
6. Wait for the operator inspection and approval process.
7. Once the identity verification process is completed, the approval results will be sent to the mail registered with your account.
Description of identity verification status
- Reviewing: The administrator is reviewing the authentication documents for registered identity verification.
- Rejected: A state in which identity verification has been rejected and documents must be re-registered.
- Approved: Identity verification approval completed
Manage RCS Bizmessage
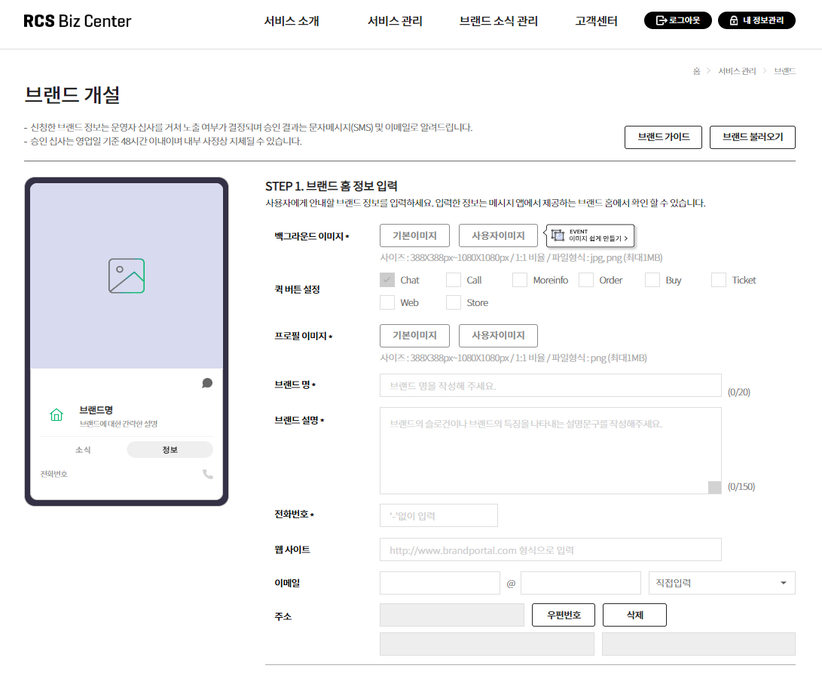
Create a brand
To use the RCS Bizmessage service, you have to register your brand after signing up for the RCS Biz Center. [Go to the RCS Biz Center]
- Go to RCS Biz Center and select Apply as Company Representative to sign up.
- The initial signup ID is set to admin, and a subsequent signup ID is set to corporate contact. Admins can create brands. You can change the admin.
- An RCS brand is a corporate profile. After you create a brand, you request approval.
- Set a representative outgoing number for your RCS brand. You can later change the representative number to a registered number.
When attaching a telecommunication service subscription source, the RCS branded business number and the business number specified in the telecommunication service subscription source must match. You must attach all telecommunication service subscription sources for the entered calling number. - An RCS manager will approve your brand, which can take 2-3 business days.
- You can find related guides by clicking Brand Guideat the top of the Create a brand page.
Set up a brand agency
After completing the RCS brand approval, set the agency to 'NHN Cloud'.
- In RCS Biz Center, click Service Management > Brand > Brand Operations, select a brand, and specify an agency from the Manage Operations menu.
- Click Add Agency Permissions, then search for and select "NHN Cloud" in the agency name.
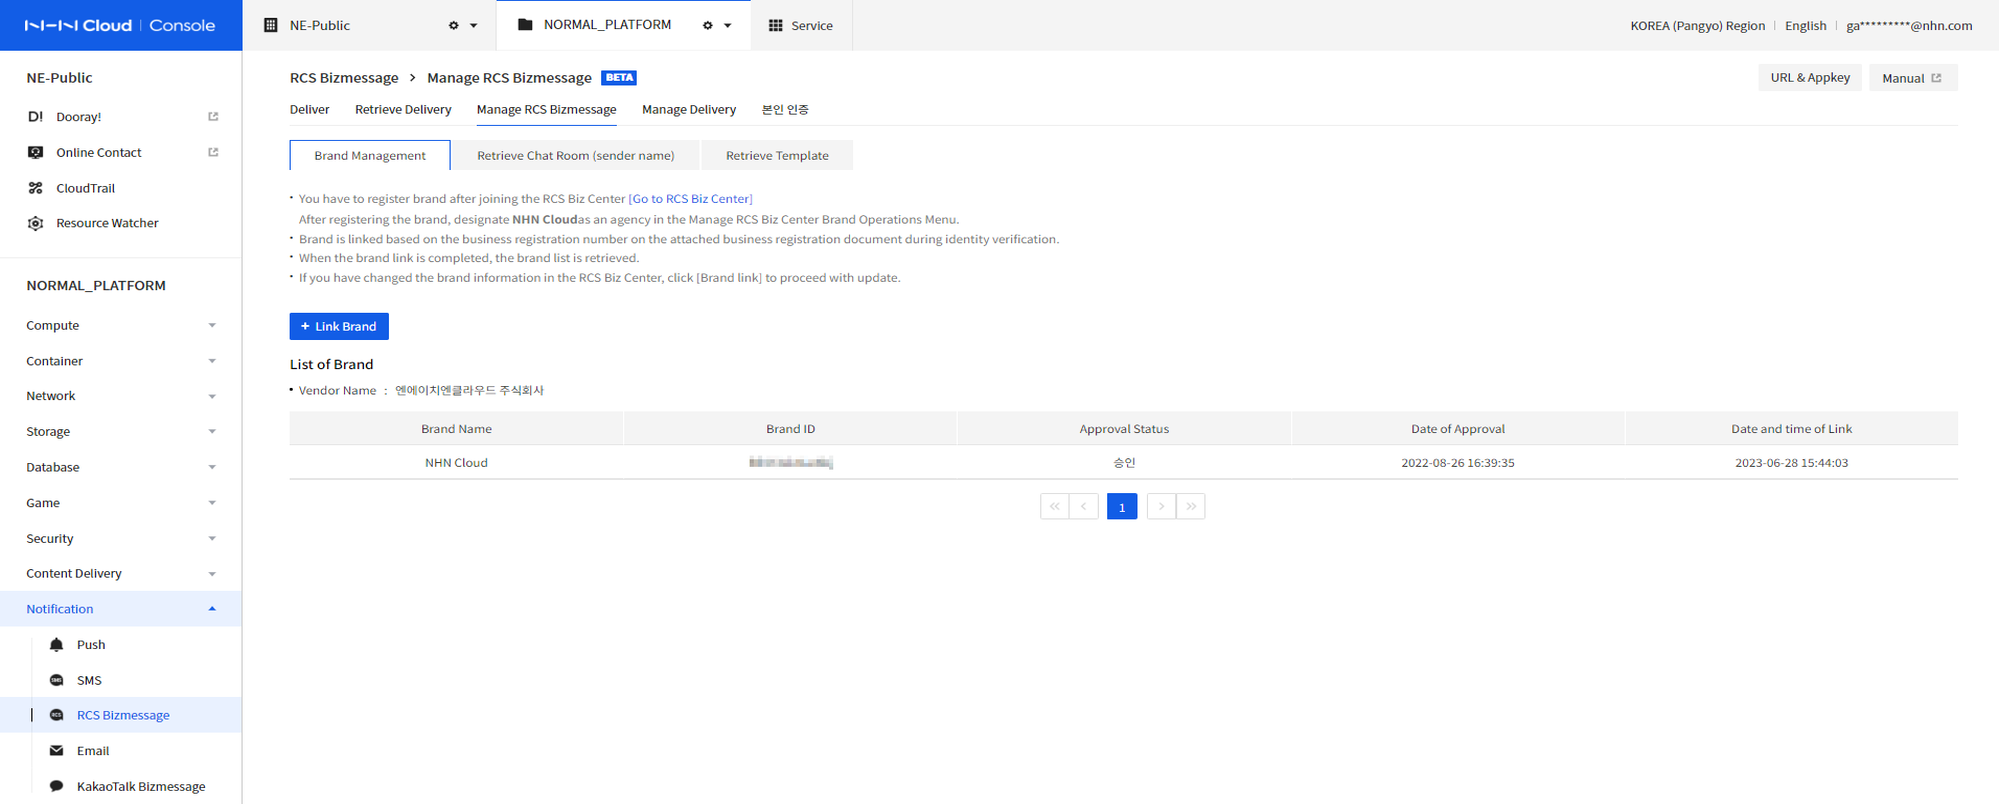
Brand Management
After setting the agency to 'NHN Cloud', link the brand in the Notification RCS console.
- Clicking on + Link Brand button also links brands and sub-resources (chat rooms, templates).
- If there are any changes after the interlock, press the Link Brand button to proceed with the synchronization.
- You can check the brand information registered with the RCS Biz Center in the brand list.
- Only approved brands identified in the list can be used for sending.
- The date and time of approval means the date and time approved by the RCS Biz Center, and the date and time of linking means the date and time when the brand is linked to NHN Cloud's RCS Bizmessage service.
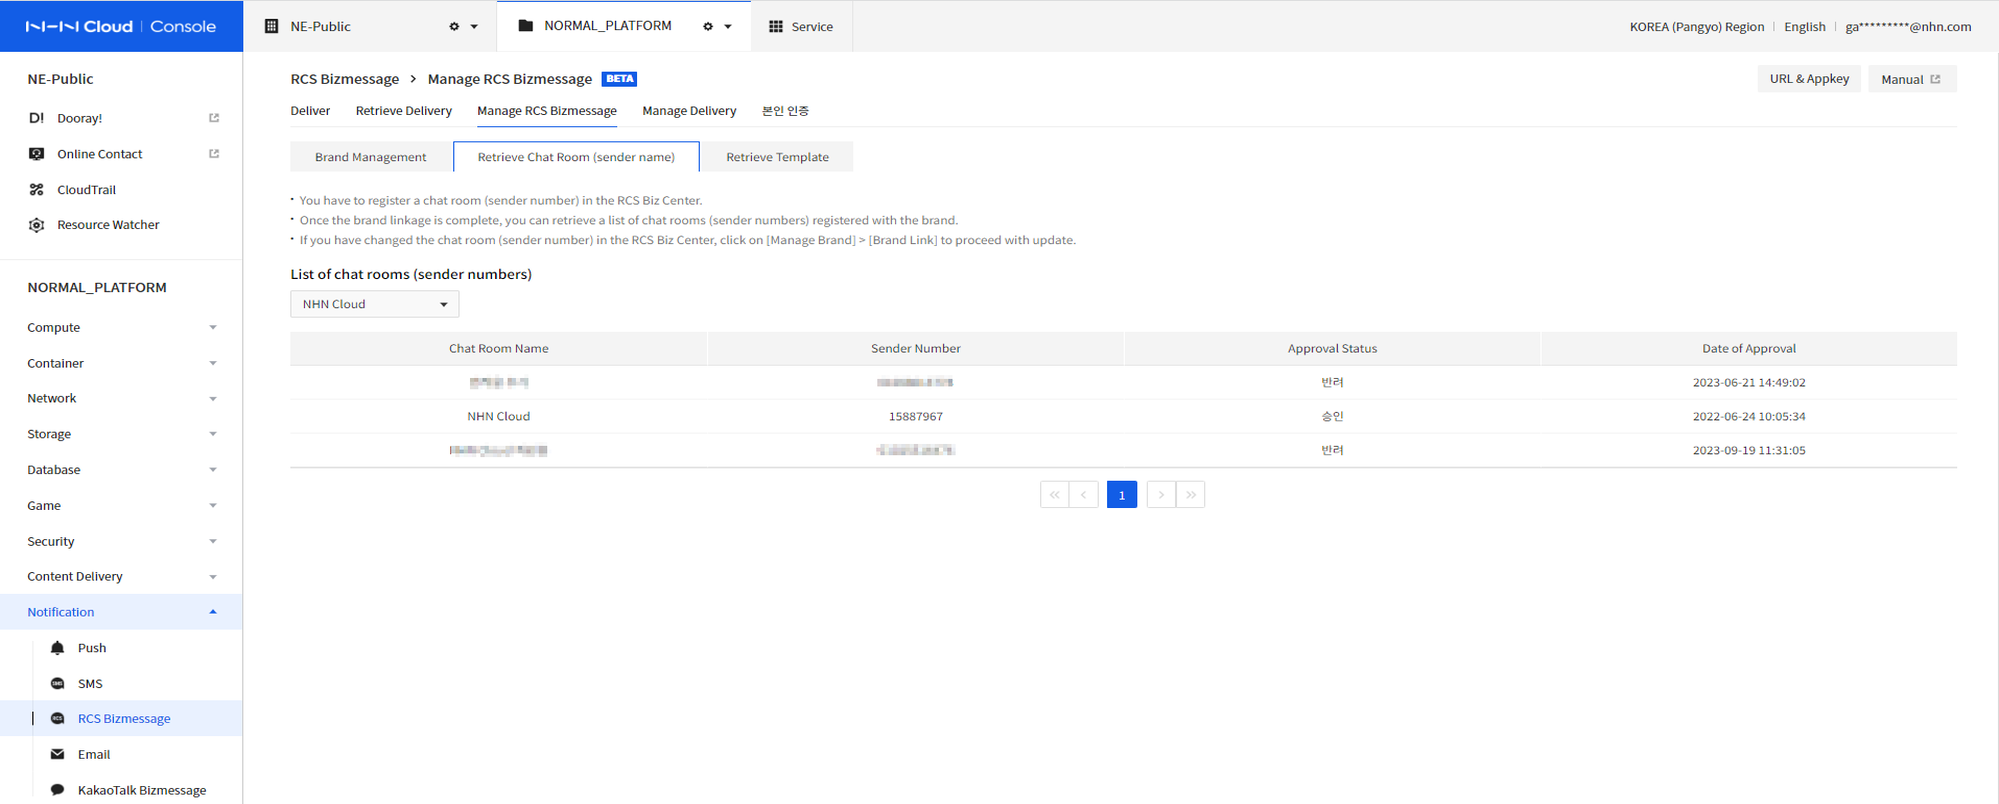
Retrieve Chat Room (sender number)
You must register a chat room (sender number) in the RCS Biz Center.
- In RCS Biz Center, click Service Management > Brand > Brand Operations, select a brand, and go to the Manage Sender Numbers menu to register a calling number.
- Once the brand linkage is complete, you can look up the list of chat rooms (sender numbers) registered with the brand.
- If you select the brand you want from the drop box, you can look up the list of chat rooms (sender numbers) registered with that brand.
- Only sender numbers with an ‘Approved’ status are available.
Register Templates
Request to register/approve an RCS text template. Templates can only be informational messages.
- In RCS Biz Center, register a template from the Service Management > Brand > Manage Templates menu.
- The description and style (cell) template can be pre-registered with the message content to be sent and sent after operator approval.
- The basic (free) template can send informational messages without requiring prior registration or approval of the message to be sent.
- The description template allows you to enter text in the form of a sentence, like a text message.
- The style (cell) template can be entered in rows and columns. You can set the bold, font size, alignment, font color, and add lines.
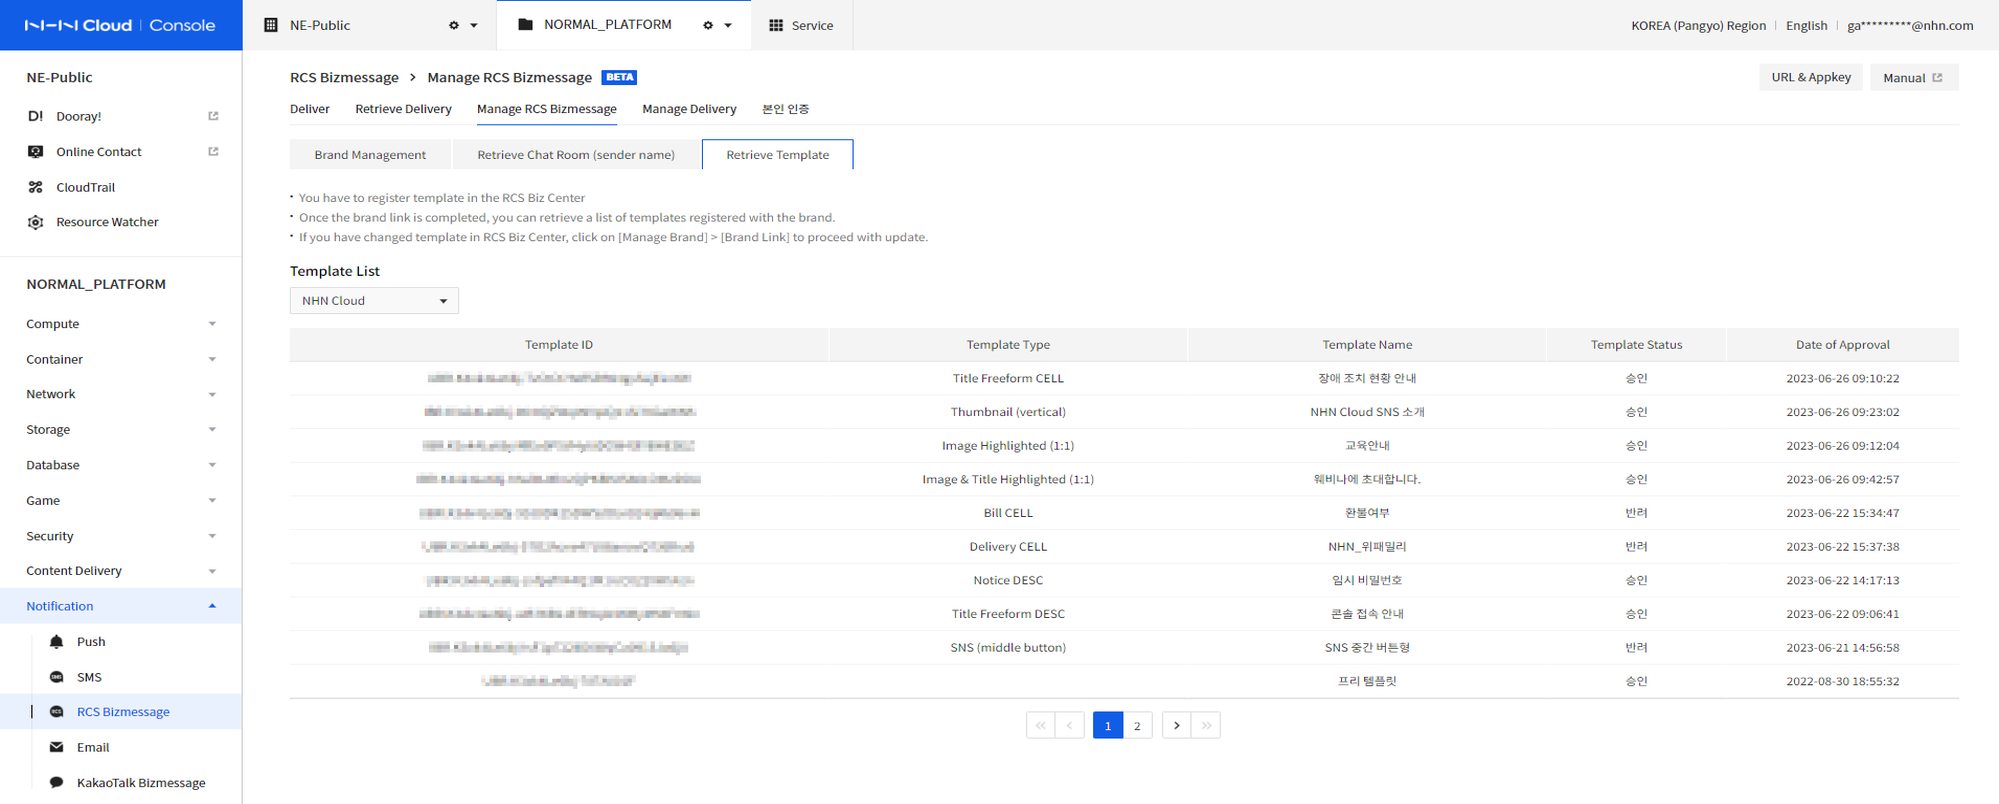
Retrieve Template
You have to register the template in the RCS Biz Center.
- Once the brand linkage is complete, you can look up the list of templates registered with the brand.
- If you select the brand you want from the drop box, you can retrieve the list of templates registered with that brand.
- If you made changes to the template in RCS Biz Center, click Brand Management > Link Brandto update it.
Send
- To send an RCS Bizmessage, you must first proceed with the brand linkage in the [Manage RCS Bizmessage] menu.
- After the brand linkage, you can send a message by selecting a brand and a chat room (sender number).
Send Regular SMS
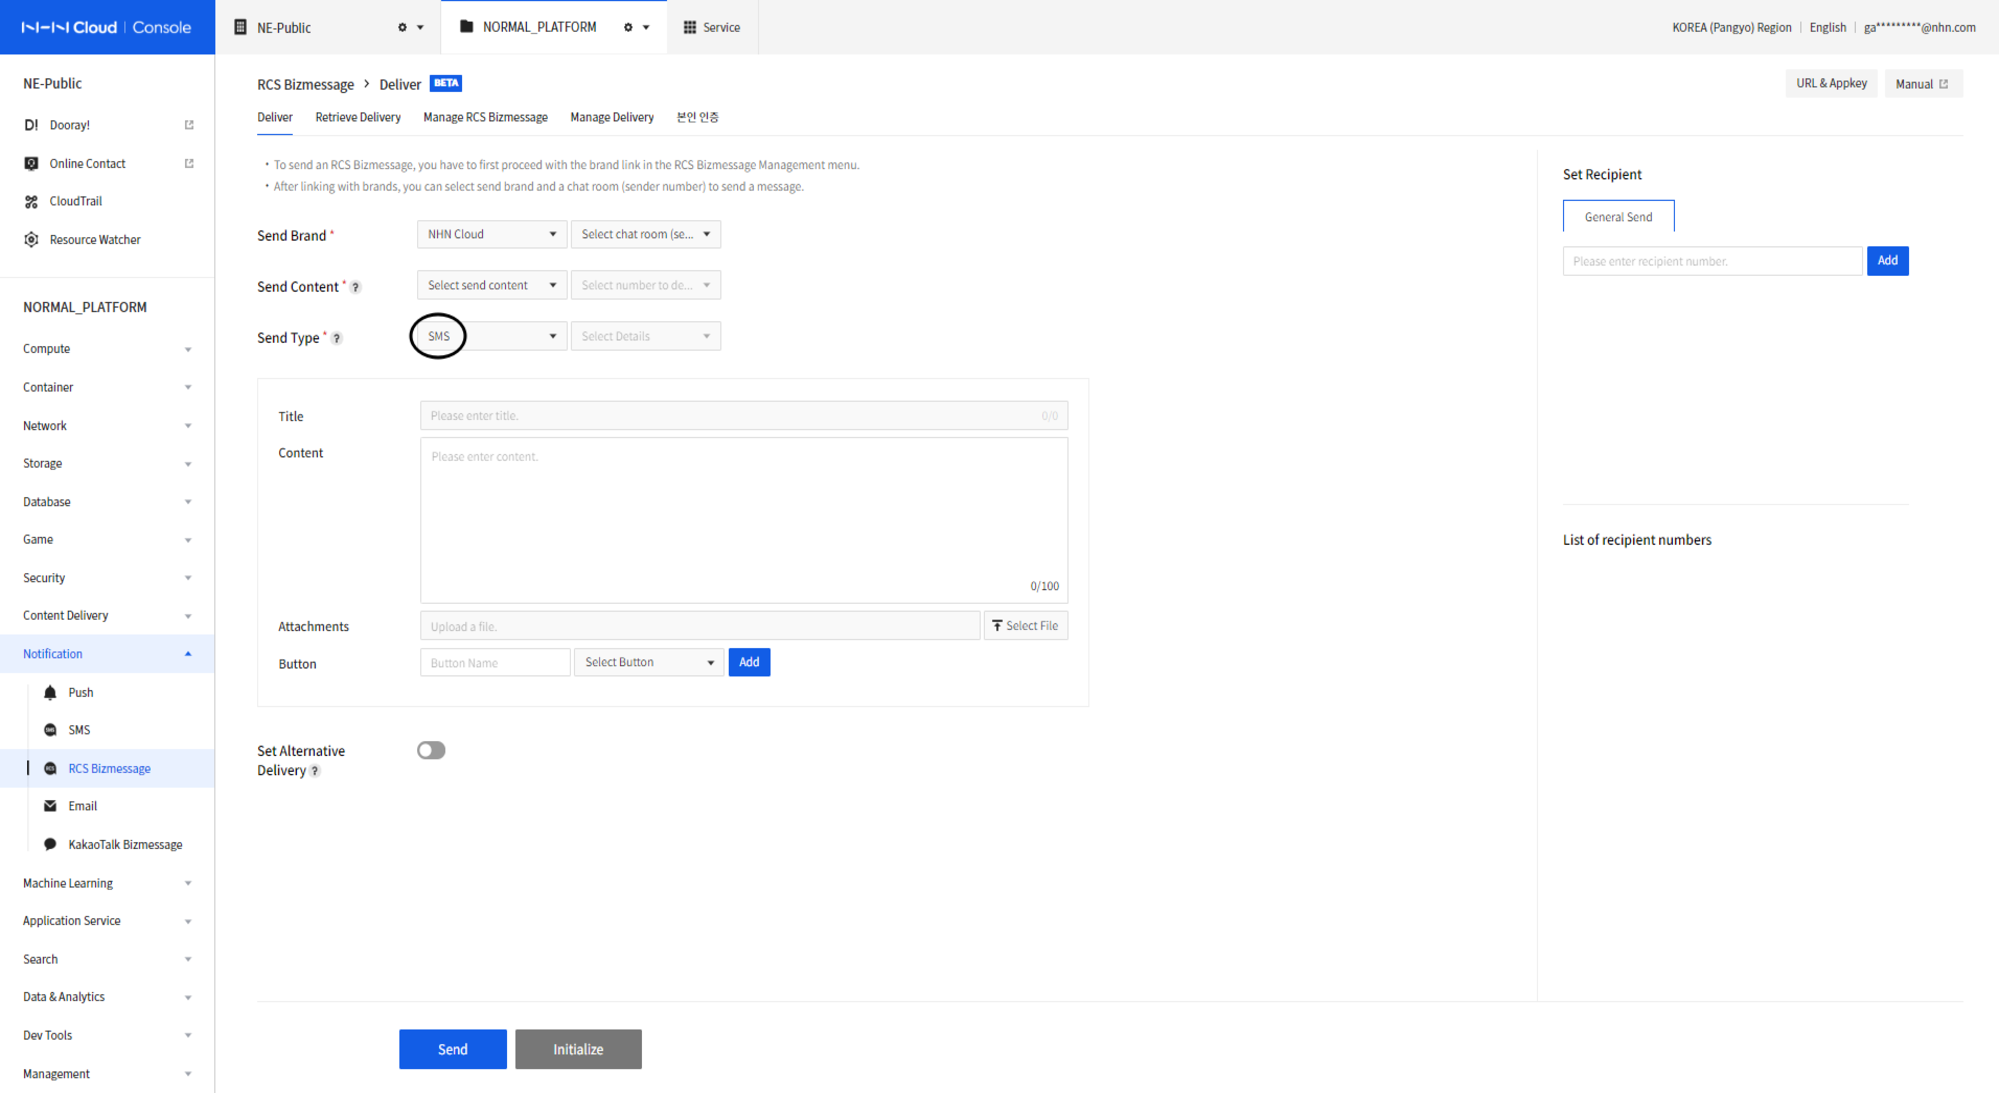 1. Select Sending brand.
2. Select a chat room (sender number).
3. Select whether the outgoing content is an ad or not. If this is an ad, you have to select the 080 Deny-to- receive number.
Go to the Manage Sending menu to set up SMS usage.
4. Select the sending type as SMS.
5. Add message content (maximum 100 characters) and buttons (maximum one).
6. Under Receiver Settings, enter the receiver number you want to send and click Add (maximum 50 people).
7. Click Send.
1. Select Sending brand.
2. Select a chat room (sender number).
3. Select whether the outgoing content is an ad or not. If this is an ad, you have to select the 080 Deny-to- receive number.
Go to the Manage Sending menu to set up SMS usage.
4. Select the sending type as SMS.
5. Add message content (maximum 100 characters) and buttons (maximum one).
6. Under Receiver Settings, enter the receiver number you want to send and click Add (maximum 50 people).
7. Click Send.
Send General LMS
 1. Select Sending brand.
2. Select a chat room (sender number).
3. Select whether the outgoing content is an ad or not. If this is an ad, you have to select the 080 Deny-to- receive number.
Go to Manage Sendingto set up SMS usage.
4. Select the sending type as LMS.
5. Add message titles (maximum 30 characters), content (maximum 1300 characters) and buttons (maximum 3 characters).
6. Under Receiver Settings, enter the receiver number you want to send and click Add (maximum 50 people).
7. Click Send.
1. Select Sending brand.
2. Select a chat room (sender number).
3. Select whether the outgoing content is an ad or not. If this is an ad, you have to select the 080 Deny-to- receive number.
Go to Manage Sendingto set up SMS usage.
4. Select the sending type as LMS.
5. Add message titles (maximum 30 characters), content (maximum 1300 characters) and buttons (maximum 3 characters).
6. Under Receiver Settings, enter the receiver number you want to send and click Add (maximum 50 people).
7. Click Send.
Send MMS
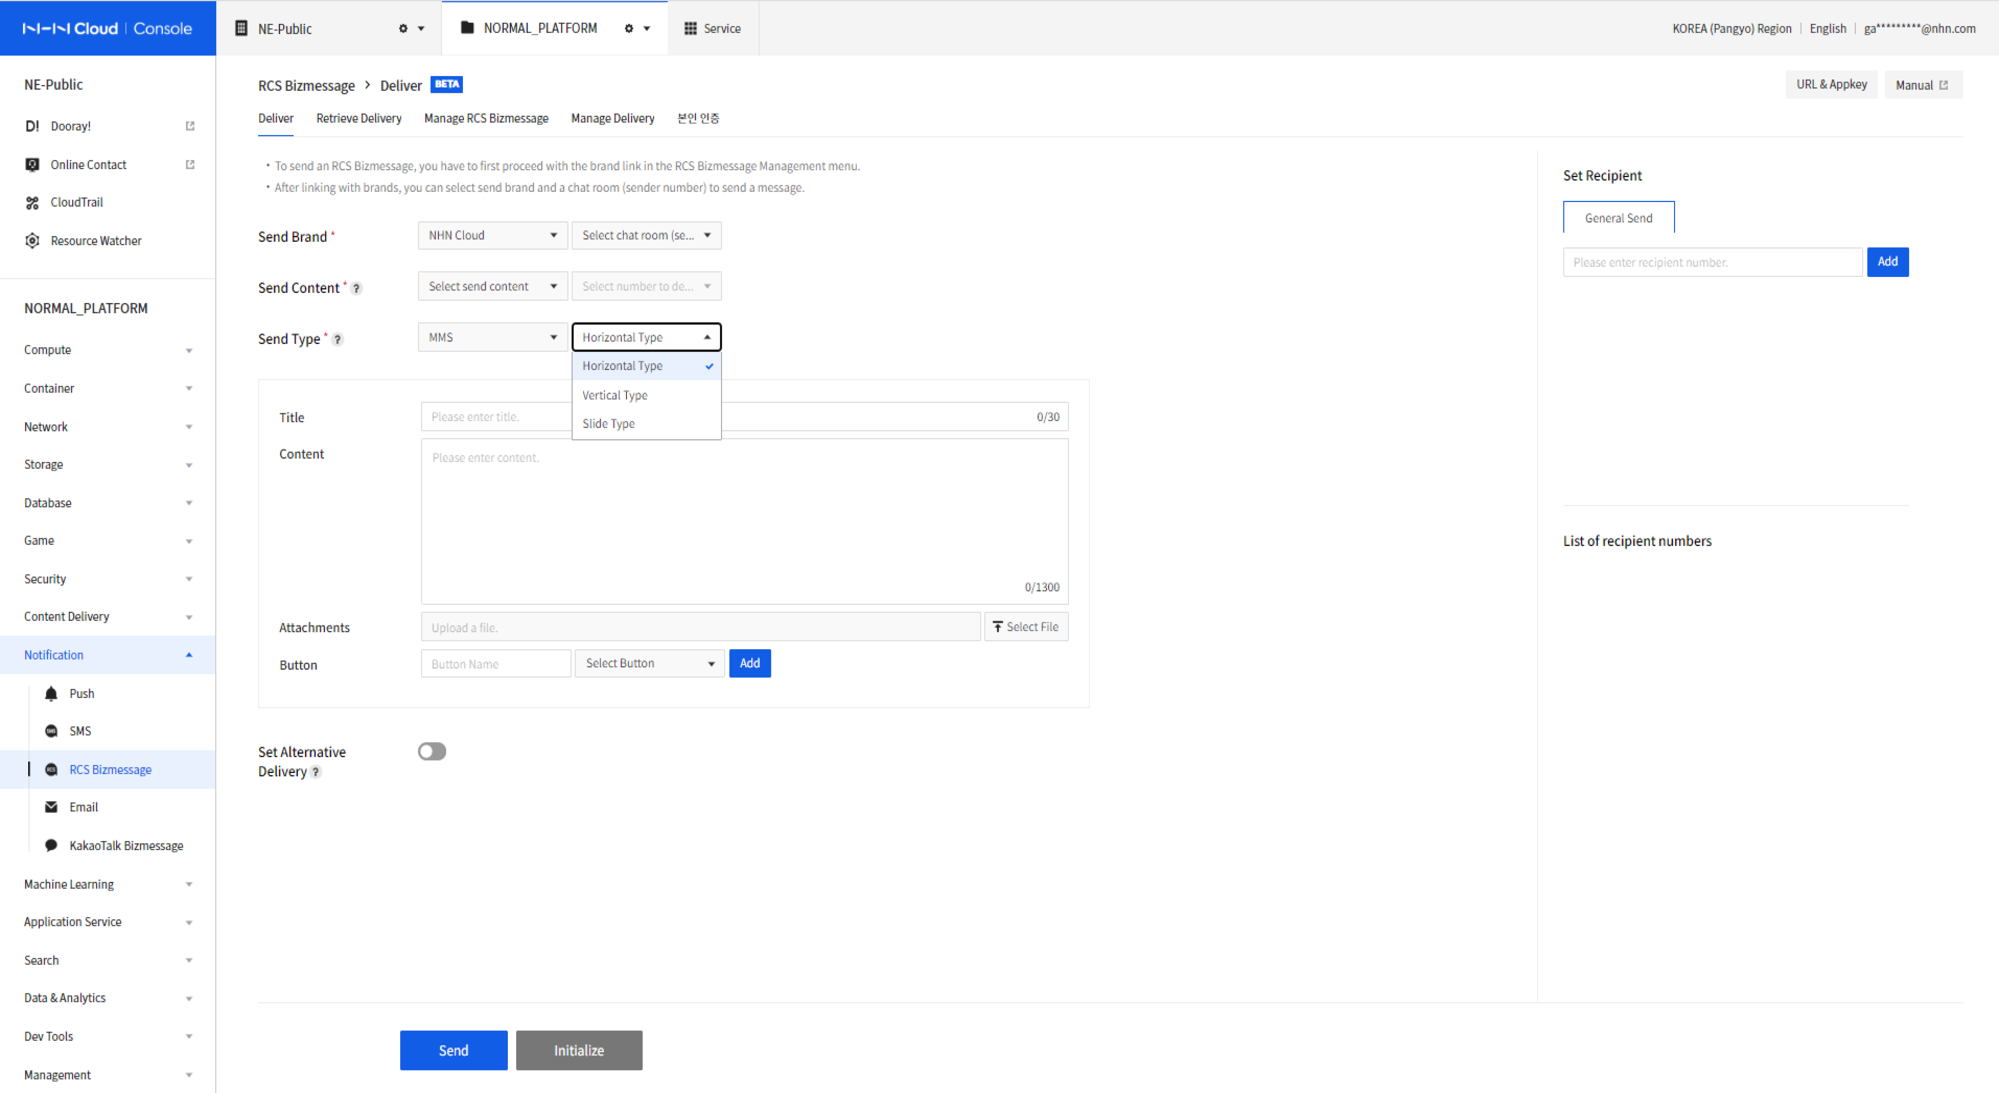 1. Select Sending brand.
2. Select a chat room (sender number).
3. Select whether the outgoing content is an ad or not. If this is an ad, you have to select the 080 Deny-to- receive number.
Go to Manage Sendingto set up SMS usage.
4. Select the send type as MMS.
5. Under Select Details, select Horizontal or Vertical.
6. Add titles (maximum 30 characters), content (maximum 1300 characters), images (maximum one) and buttons (maximum two per card).
7. Under Receiver Settings, enter the receiver number you want to send and click Add (maximum 50 people).
8. Click Send.
1. Select Sending brand.
2. Select a chat room (sender number).
3. Select whether the outgoing content is an ad or not. If this is an ad, you have to select the 080 Deny-to- receive number.
Go to Manage Sendingto set up SMS usage.
4. Select the send type as MMS.
5. Under Select Details, select Horizontal or Vertical.
6. Add titles (maximum 30 characters), content (maximum 1300 characters), images (maximum one) and buttons (maximum two per card).
7. Under Receiver Settings, enter the receiver number you want to send and click Add (maximum 50 people).
8. Click Send.
Send MMS (Card Type)
1. Select Sending brand. 2. Select a chat room (sender number). 3. Select whether the outgoing content is an ad or not. If this is an ad, you have to select the 080 Deny-to- receive number. Go to Manage Sendingto set up SMS usage. 4. Select the send type as MMS. 5. Under Select Details, select a slide type and slide size. 6. Set the number of slides in the message (minimum 3 and maximum 6). 7. Enter a title (maximum 30 characters), content (maximum 30 characters), images (maximum one) and buttons (maximum two) for each card. 8. Under Receiver Settings, enter the receiver number you want to send and click Add (maximum 50 people). 9. Click Send.
Send Template
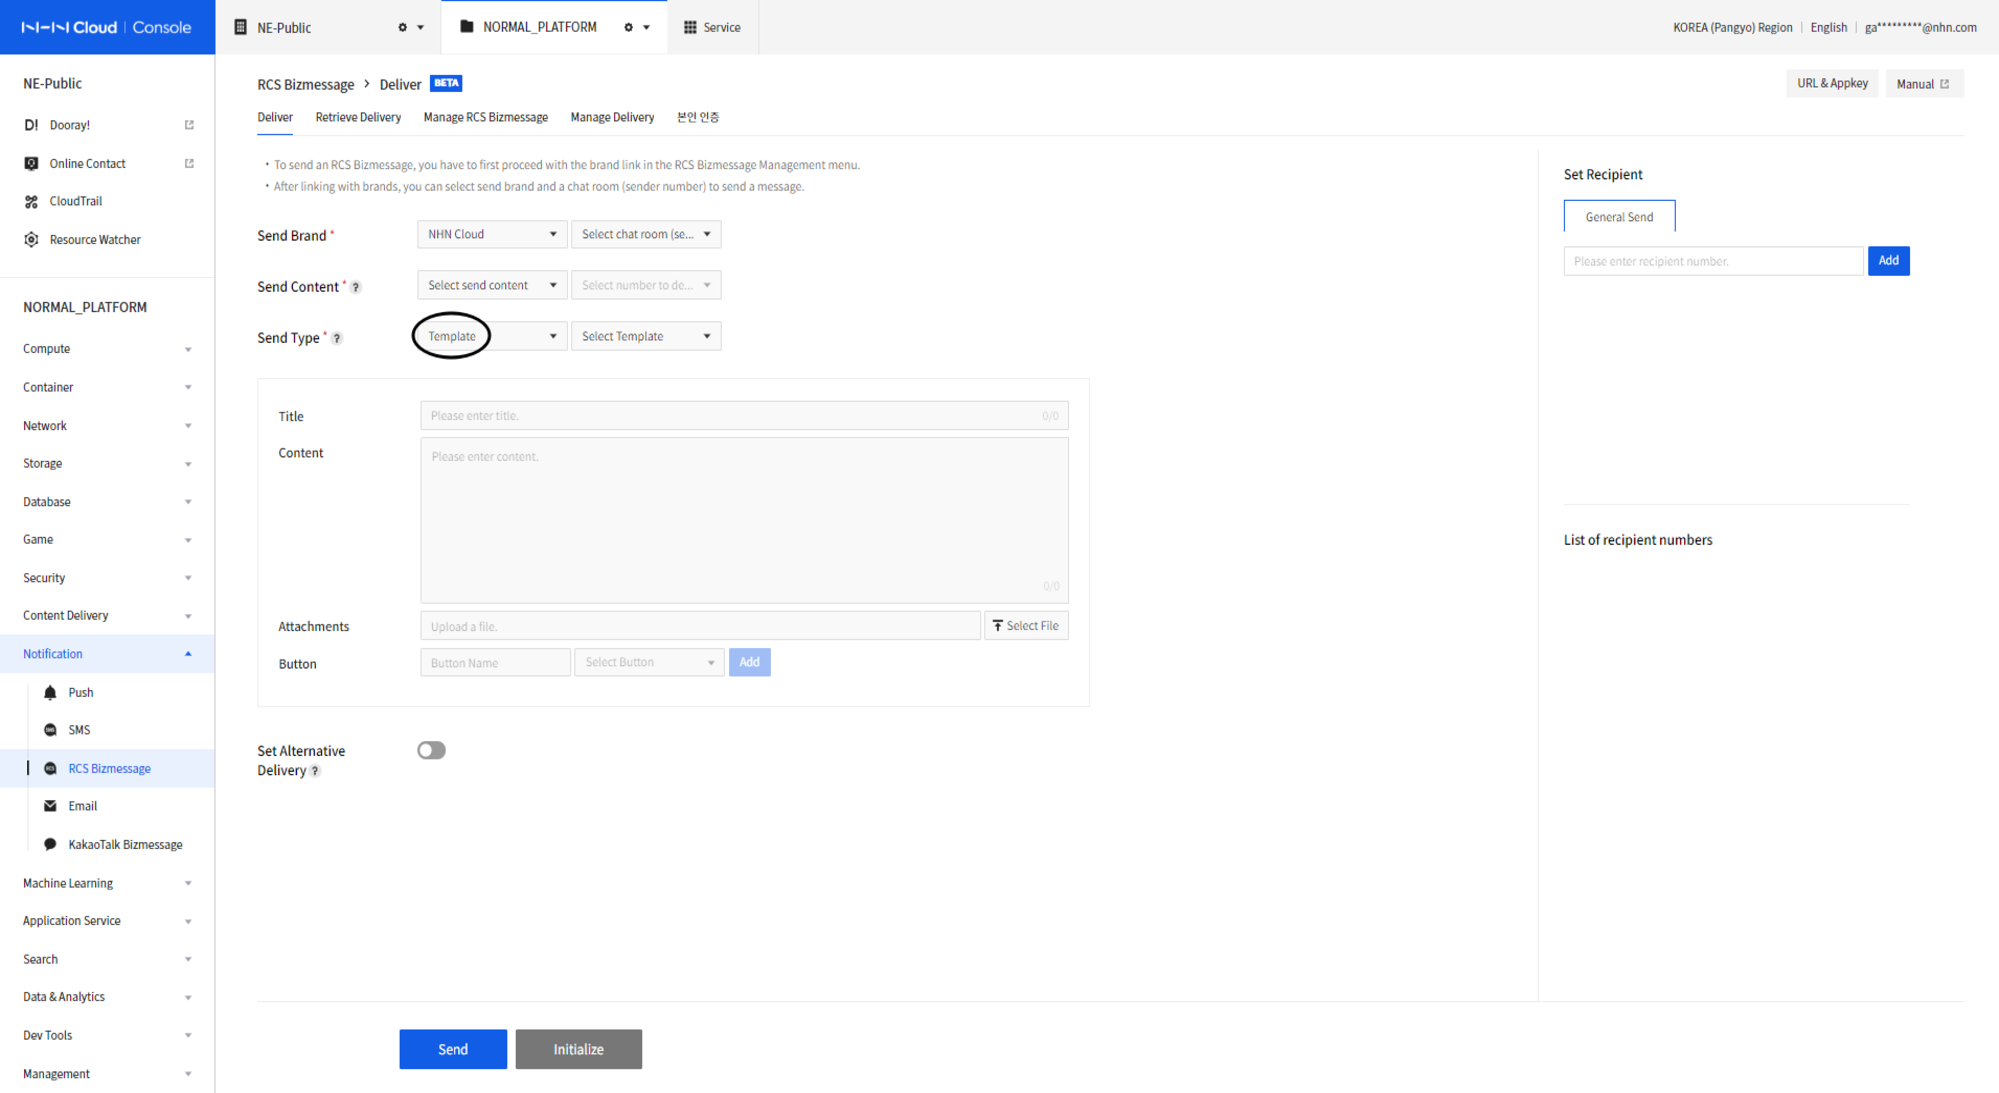 1. Select Sending brand.
2. Select a chat room (sender number).
3. Select the send type as Template.
4. Select the template you want to send.
Templates are registered in advance in RCS Biz Center.
5. If it is a free template, create a message (maximum 90 characters) to send.
6. Under Receiver Settings, enter the receiver number you want to send and click Add (maximum 50 people).
7. For each receiver, enter the appropriate value for the template replacement.
8. Click Send.
1. Select Sending brand.
2. Select a chat room (sender number).
3. Select the send type as Template.
4. Select the template you want to send.
Templates are registered in advance in RCS Biz Center.
5. If it is a free template, create a message (maximum 90 characters) to send.
6. Under Receiver Settings, enter the receiver number you want to send and click Add (maximum 50 people).
7. For each receiver, enter the appropriate value for the template replacement.
8. Click Send.
Button Type
You can utilize the button feature at the bottom of the message.
Open Chat Room
- Send the message you set to the phone number you set.
- Enter a name for the button, and then enter the phone number to send the message to.
- Enter the message content to send.
Copy
- The value you set is copied.
- Enter a name for the button, and then enter a value that will be copied when the button is clicked.
Make a Call
- Make a call to the phone number you set.
- Enter a name for the button, and then enter a phone number to call when the button is clicked.
Show map/search map
- Show the location you set on the map app.
- Enter a name for the button, then enter the latitude and longitude of the location.
- Enter a location name and map URL (URLs including https://)
Share your current location
- The recipient sends a message to the sender with the recipient's current location.
- Enter a name for the button.
Link URLs
- Connect to a web link.
- Enter a name for the button, and then enter a link to open when the button is clicked.
- Must enter 'http://', 'https://'를 when entering a link.
Register an event
- Register the event in the recipient's calendar app.
- Enter a name for the button and select a start and end date for the schedule.
- Enter the schedule title and schedule content.
Retrieve Send Results
- You can retrieve the results of the RCS Bizmessage request.
- You can set the conditions for each item to retrieve.
- The sender brand and send type are required values.
- You can use either the date and time of sending or the date and time of receipt as a condition.
- The time condition is available maximum one month.
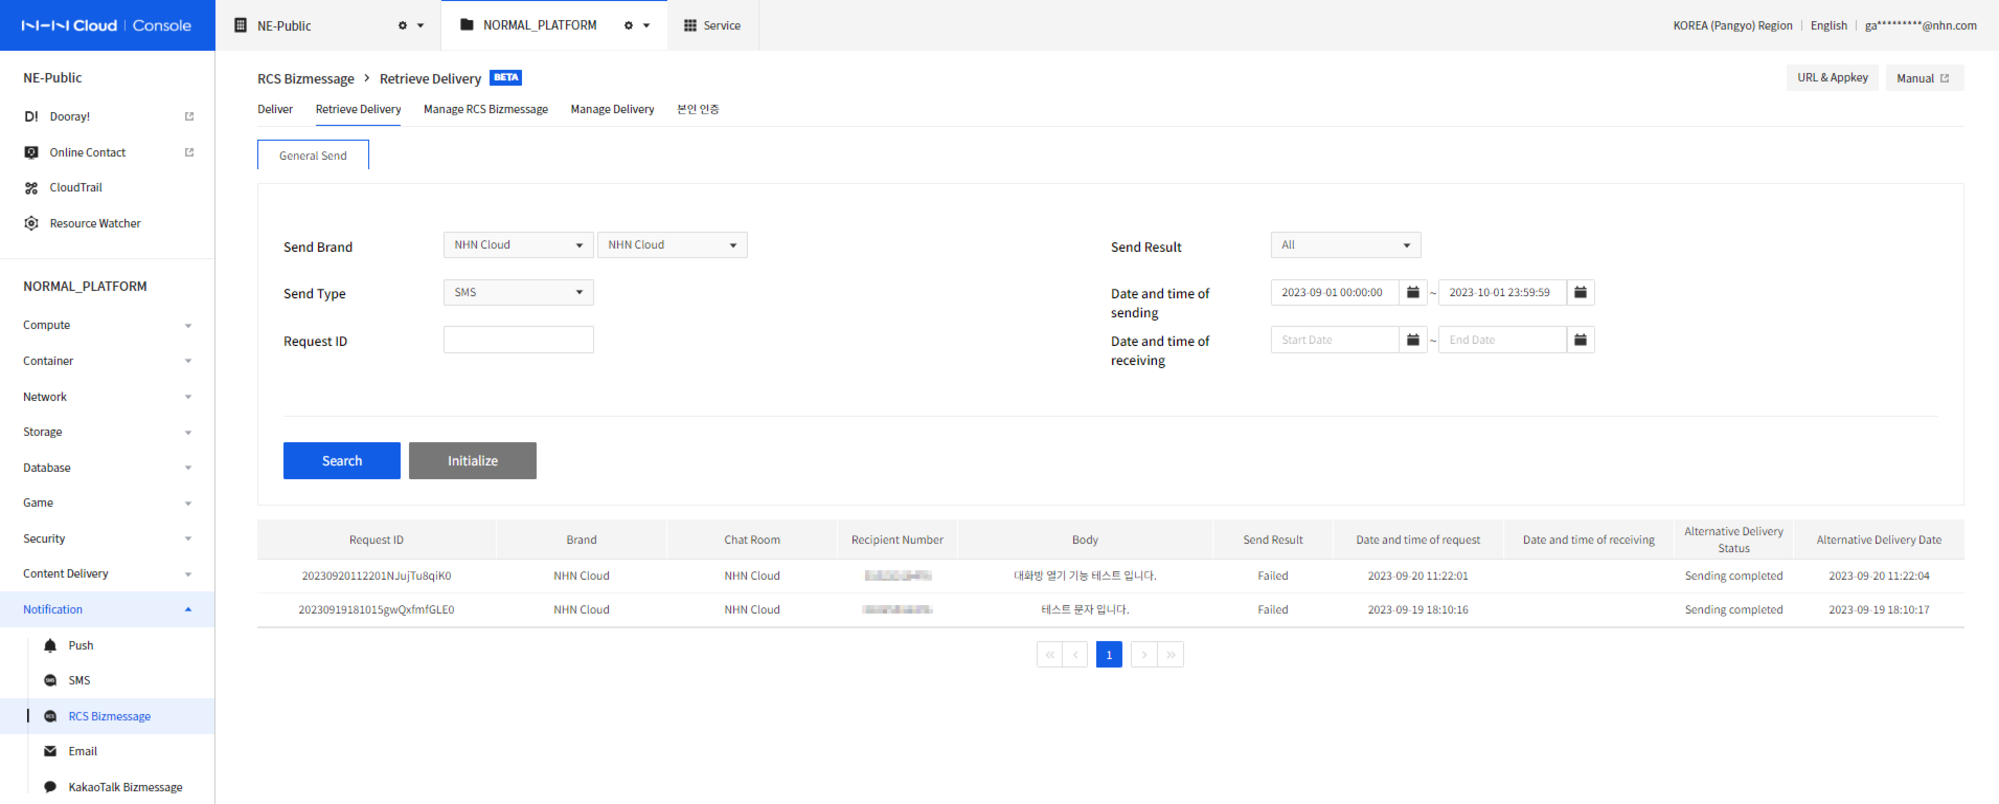
Send Result Status
- Total
- Prepare to send: The request has been made, but the sending has not been processed yet.
- Sending: RCS message sending is in progress and has not yet been received.
- Sending successful: The RCS message sending request has been completed successfully and the message has been reached on the receiver device.
- Sending failed: The Receiver device was not reached because the sending of the RCS message has failed.
- Sending canceled: RCS messages sending has been cancelled by the NHN Cloud operator.
Manage Sending
- You must use the SMS service to set alternative sending settings and 080 Deny-to-receive number in the RCS Bizmessage service.
- Once the SMS service is set up, you can set up a sender number for alternative sending and retrieve the list of 080 Deny-to-receive numbers for sending advertising messages.
Use SMS Service
- Only SMS services enabled in the same project can be linked.
- You can use the toggle button to switch the SMS service status to Active or Disabled.
- Touch the Save button to update the SMS service linking status.
Set up Alternative Sending
- If you fail to send RCS Bizmessage, you can replace it with an SMS message to send a message.
- Click the Set button in the chat room (sender number) list to set the alternative sending status and alternative sending number.
- Alternative sending sender numbers can only be set if they are registered with SMS service.
- Only messages from chat rooms (sender numbers) that have failed to send will be sent by LMS or SMS instead. (Separate fees apply for each type of texting)
- If you delete or block the selected sender number, or stop using the SMS service, the text will not be replaced for sending and will need to be set up again.
- Depending on the message, some items like buttons and links might look different from RCS Bizmessage.
- The content for alternative sending is sent in EUC-KR, and unsupported emoji will fail for alternative sending.
Retrieve 080 Deny-to-receive number
- When sending advertising information, you must include a free unsubscribe process so that recipients can unsubscribe or withdraw their consent to receive it without charge.
- You can look up the 080 Deny-to-receive number registered with the SMS service and send messages.
- You can see how to register for a 080 Deny-to-receive number in Settings for 080 Deny-to-receive number.
Table of Contents
- Notification > RCS Bizmessage > Console Usage Guide
- Identity Verification
- Required documents according to membership type
- Identity verification process
- Description of identity verification status
- Manage RCS Bizmessage
- Create a brand
- Set up a brand agency
- Brand Management
- Retrieve Chat Room (sender number)
- Register Templates
- Retrieve Template
- Send
- Send Regular SMS
- Send General LMS
- Send MMS
- Send MMS (Card Type)
- Send Template
- Button Type
- Retrieve Send Results
- Send Result Status
- Manage Sending
- Use SMS Service
- Set up Alternative Sending
- Retrieve 080 Deny-to-receive number